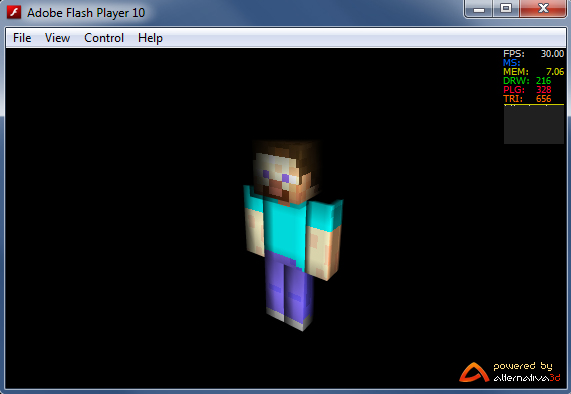
add lighting to the minecraft character
If you haven’t seen my last blog post about the minecraft character i created using alternativa3d then you should check it out here. This post is a follow up from this changing the existing code to include lighting in the scene. I’ve decided that I’m going to do several follow on posts starting with this one so stay tuned for more! Anyway in this example I changed the minecraft player/character we created and added a lighting effect which is now available in alternativa3d 7.7.0. In order to do this there are a few things we need to do, first off we need to add in the extra libraries.
import alternativa.engine3d.lights.DirectionalLight;
import alternativa.engine3d.materials.VertexLightMaterial;
The directional light is going to be our light source, the vertex light material is the new material which we will apply to the model to make sure it interacts with the light source. Next up we need to add a variable for our light source and then initiate it and direct it on the scene. I had to do some playing around using the debug features of alternativa to get the light source in the position I wanted. So you may have to do some trial and error depending on what you are doing.
private var directionalLight:DirectionalLight;
// Lighting
directionalLight = new DirectionalLight(0xFFFFFF);
directionalLight.x = 0;
directionalLight.z = 20;
directionalLight.y = 20;
directionalLight.rotationX = -90*Math.PI/180;
directionalLight.rotationZ = 180*Math.PI/180;
container.addChild(directionalLight);
Once we have our light source we need to make sure that our character actually also calculates the normals for the 3d objects. To do this each of the parts of the body you need to add a one line as follows.
bodypart.calculateVerticesNormals(true, 0.01);
The last thing we need to do is apply a texture material that uses our texture as well as taking into consideration any lighting. To do this we can use the VertexLightMaterial, so we need to replace any TextureMaterial with VertexLightMaterial like so
// HEAD texture materials
var front_head:VertexLightMaterial = new VertexLightMaterial(cropBitmapData(src, new Point(8, 8), 8, 8),repeat,smooth,mipMapping,resolution);
var back_head:VertexLightMaterial = new VertexLightMaterial(cropBitmapData(src, new Point(24, 8), 8, 8),repeat,smooth,mipMapping,resolution);
var left_head:VertexLightMaterial = new VertexLightMaterial(cropBitmapData(src, new Point(16, 8), 8, 8),repeat,smooth,mipMapping,resolution);
var right_head:VertexLightMaterial = new VertexLightMaterial(cropBitmapData(src, new Point(0, 8), 8, 8),repeat,smooth,mipMapping,resolution);
var top_head:VertexLightMaterial = new VertexLightMaterial(cropBitmapData(src, new Point(8, 0), 8, 8),repeat,smooth,mipMapping,resolution);
var bottom_head:VertexLightMaterial = new VertexLightMaterial(cropBitmapData(src, new Point(16, 0), 8, 8),repeat,smooth,mipMapping,resolution);
Note that it still takes the same parameters as the regular texture material but it will now also work with the directional light. Once that is all done you should have something that looks like this
 Download the demo files here for flash and flex

Comments
Comments are currently closed